Showing posts with label Technical file. Show all posts

Sunday, 13 December 2015

Example of my final make up design

Products:-

-Illamasqua skin base foundation (white)
-Illamasqua loose powder
-Kryolan  Supercolour (black,red,white)
-Illamasqua powder eye shaddow (black)
-Illamasqua glitter pigment (white)

Brushes:-

-Flat foundation brush
-Kabuki buffing brush
-Powder puff (to apply loose powder)
-Disposable mascara wand (to apply white supercolour to the eyelashes/eyebrows)
-Small angled brush (for lips)
-Small flat eye shadow brush (to apply black eye shadow)
-Small rounded eye shadow brush (to blend out black eye shadow)
-Small flat brush (to apply glitter)
-Small flat brush (to apply grey supercolor)
-Stippling brush (to brush away excess powder)
-Big blending brush (to contour)


I started by applying Illamasqua skin base all over the face starting from the center using flat foundation brush, making sure to blend to the neck and ears. After I took some Illamsqua loose powder and applied it using powder puff, brushed away any excess powder using stippling brush. Then I grabbed big blending brush and dipped it into Illamasqua powder eye shadow in black and contoured the temples/forehead and cheekbones. Taking  I started working on my eye make up, I picked up small flat brush and mixed two supercolour colors black and white to create grey color, after I applied it in desired shape I took another small flat brush to apply glitter, lightly dabbing on the color not smudging. Then to create the frames I took small flat eye shadow brush to apply Illamasqya powder eye shadow, then blend it out with small rounded brush. After that I moved on to eye lashes and eye brows using disposable mascara wand I applied white supercolor to eye lashes and eye brows. Lastly I mixed red and black supercolors together to create dark red and applied it using small angled brush.


Matching foundation/creating perfect base

Make up products:-
-Kryolan foundation palette
-Illamasqua loose powder

Brushes:-
-Flat foundation brush
-Kabuki buffing brush
-Powder sponge
-Stippling brush

Health and Safety:-
-Use spatula to scrape out foundation on the back of clean hand


Color matching by applying a little sample of the lightest foundation in the palette, it is important to match it to the neck color
Starting from the center of the face start applying foundation all over the face using flat foundation brush, medium coverage, luminous finish
Using kabuki buffing brush going in circular motion, it created much more of a natural sheer coverage.
Applying loose powder using powder sponge, it created matte finish, make sure to use stippling brush to remove excess powder


I enjoyed trying to match the color of foundation and creating perfect coverage, I think I have done a good job matching foundation to the natural skin color, The foundation applied very smoothly and did not appear streaky or patchy, the coverage appeared much heavier before using kabuki buffing brush, I learnt that if I want to create more natural look and there is too much coverage on the face just use kabuki buffing brush to create much more of a sheer coverage.Loose powder added much more of a matte finish, I have learnt to use powder if a client does not want luminous finish and prefers matte look.

Consultation and Cleansing

Before we started cleansing we been given consultations sheets, they clearly state what we need to do before cleansing somebody's face, after, and just stating general guidelines. The consultation is crucial part in the make up industry, if after assessing client's face it has a lot of infections or just generally in very bad condition the make up can not be applied at all. Need to pay attention to blemishes, scars, hairs, to see how you can cover it best. Consultations are every important due to hygiene, comfort of the client and also the make up artist, so no contamination and hygiene problems appear.


Products:-

-Cleanser
-Toner
-Moisturizer


Health and Safety:-

-Dispose any cotton pads or q-tips after usage
-Ask client if they are wearing contact lenses, to make sure that I don't irritate the eye, be more delicate

-Before starting the process clearly state 'I am going to wash my hands' to the client
-Cleansing, toning and moisturizing (if a man, then avoid using cotton pads getting caught in the stubble, use tissues
-Prepare the skin properly and correctly, it is key to healthy and clean skin
-Make sure the hands are clean, hair tied up, couch roll on surface, shoulder wrap to protect client's clothes from any fall out, clips needed to prevent clients hair from going on the face
-Clean brushes, dip the brushes into the alcohol the using coach roll gently swirl the brushes to remove any dirt.
-Use cotton buds and cotton pads to cleanse, don't forget the neck
-Ask client if they have any allergies, contact lenses
-Use only hypoallergenic products
-Don't be afraid to ask client to remove eye make up themselves, as it is more comfortable for the client to apply enough pressure themselves


Evaluation:-

I enjoyed learning new techniques of how to remove make up from someone else's face  how to control the cotton pad, which direction to go which was from the bottom then up. I found it very difficult working in the eye area to make sure I don't put too much pressure and remove every single trace of eye make up without irritating the eyes. 


Skin and Eye Conditions

Boil - skin infection that happens in a hair follicle or gland, the skin turns red then lumps appear on the affected area

Scabies - is a contagious skin disease, that causes itching because of infestation of the mites

Impetigo - is a highly contagious skin condition caused by bacterial infection, usually shows up on the face, neck and hands, usually children are affected by this condition.

Ringworm - is contagious fungal infection, the shape of the ring surrounded by red itchy skin, the middle is left skin toned.

Acne - can be caused by skin oils, hormones or bacteria. it occurs when hair follicles are clogged by oil or excessive skin cells.

Rosacea - is a skin disease that causes redness around the cheek area, chin, nose and forehead.

Folliculitis - is infection in the hair follicle, shows up as a little red boil or spot.

Cellulitis - is bacterial infection, shows up as red, swollen and tender area of the skin.

Contact dermatitis - is a skin allergy, can be caused by perfumes or other materials, appears as a red rash on the skin

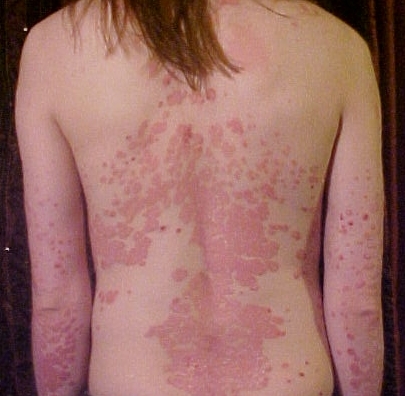
Psoriasis - is a common skin condition, caused by over production of skin cells, appears as red, flaky patches on the skin.

Conjunctivitis - is a highly contagious bacterial eye disease, caused by inflammation of conjunctiva, eye appears red.

Stye - is a infection of the eye lid, causing a small lump to appear on the affected eye lid.


Final evaluation of the unit

The Elizabethan unit was very interesting to me, finding out the cosmetics that Tudor women used also the recipes of them and finding out more about the history of how women wore their make up and hair, what they thought was beautiful and acceptable. I have definitely improved my research skills because this unit required a lot of research using books, websites and other sources. My practical skills also developed significantly because this unit involved a lot of practicing on other people, applying make up, learning how to cleanse, tone and moisturize, working with make up brushes and other techniques that needed to be learnt. My practical skills especially developed during the time that I needed to practice my partner's make up design before timed assessment. My time management skills also improved significantly because I had to make time for my partner to practice on me and also for me to practice on her, but most importantly to make sure I don't run out of time on my times assessment time. This unit tought me all about Elizabethan make up, how women preferred to wear it, the recipes of the cosmetics which some of the ingredients shocked me, also how to work with someone else, how to apply the make up products correctly using appropriate brushes, and how to work under pressure when there is a time limit. I made sure I stay up to date with my blog because if I fall behind I start to feel stressed, I did join late to this course however I was able to catch up with all the work that I needed to do which I am proud of, also I was very happy with the outcome of the make up design that I needed to do, I achieved the desired look that my partner wanted and managed to do it on time which is a big achievement for me.

Thursday, 10 December 2015

Technical make up lesson - Elizabethan make up

Products that I have used:-

- Illamasqua skin base
-Illamasqua loose powder
- Supercolour
-Krylon lip palette
- Blush palette

Brushes that I have used:-

- Big buffing brush
- Small angled brush
- Disposable mascara wand
-Big blusher brush
-Flat foundation brush
-Powder sponge

For the white base I started by using Illamsqua skin base foundation, covering her face, neck and ears. After I applied the skin base, I took some loose powder and applied it using the sponge, covering all the areas where I applied the skin base especially eye area because it tends to crease the easiest. After I finished using powder, I started applying the blush, I wanted to only focus on the apples of the cheeks as I noticed that's how Tudor women wore their blush, by taking big rounded blusher brush I packed on red blush only on the apples of the cheeks. For the lips I wanted them to be red but not too bright as I noticed that Tudor women did not were very bright lipsticks more neutral reds, so using small angled brush I applied the desired lip color. Finally for the eye lashes and the eye brows I used disposable mascara wand to apply the white supercolor.


Technical make up lesson - Eyes, lips and eyebrows

Products that I have used:-
- MAC Cool Neutral eyeshadow palette
- Mascara
- Kryolan lip palette

Brushes that I have used:-

- Disposable mascara wand
- Small rounded brush
- Small flat brush
- Angled brush


For the eye make up I used MAC Cool Neutral palette, I took a lighter color and applied all over the lid using small flat brush, because my partner's eye lid is not very big I wanted to use a lighter color to open up the eyes and not make them even smaller using dark color. To define the crease in the lid I used angled brush and applied a darker color. To blend in the colors and make sure there are no harsh lines I took rounded brush and blended it all out. I also applied black mascara on her eye lashes using disposable mascara wand.
For the eye brows I used one of the colors from MAC Cool Neutral palette closest to her natural eye brow color which is medium brown. I used small angled brush to be more precise and make sure I don't over line her natural eyebrow shape.


For the lips I used Kryolan lip palette, I mixed two colors which were orange and more  brown to create more of a neutral color. To apply the mixture I used small angled brush for more precision.


Technical make-up lesson - contouring

Products that I have used:-

- Kryolan foundation palette
- Kryolan powder foundation palette
- Kryoal blush pallete
- Illamasqua loose powder

Brushes that I have used:-

- Kabuki buffing brush
- Foundation brush
- Small rounded brush
- Loose powder puff
- Stippling brush 

I started by cleansing m partners face making sure there is no make up residue, then I toned and moisturized it. After this I applied foundation evenly on the face to even out the skin tone, and applying Illamasqua loose powder to set all the make up so it does not crease and makes the contour/highlight application easier.. Firstly I started to highlight the face, placing the product in the middle of the forehead, down the bridge of the nose, on the cupid bone, on the chin and on the cheekbones. After I highlighted it was time to start contouring with a darker color. Firstly i started by feeling my partners face and finding where her cheek bones are so I know where to place the color. Once I contoured her cheekbones I moved on to her temples and lightly contoured there to create a slimmer forehead appearance, then I started to contour the nose to make it appear slimmer by darkening the edges of the nose, also applied some of the darer color to the eye crease to slightly contour the eyes and created deeper eye look and lastly contouring the jaw line to reduce appearance of the double chin. Overall I was happy with the finished look, it was not too dramatic or over the top, it looked very natural and wearable for every day look.

Before:- 


After:-


Saturday, 7 November 2015

Technical make up lesson - White base

To create a white base I have experimented with a few make up products, I have tried Illamasqua skin base foundation, Kryolan super colors in white and Aqua color in white. Illamasqua skin base a lot easier to work with, it was gliding a lot smoother, not so many streaks and it was easier to buff out. Kryolan super color and aqua color on the other hand was very hard to work with it was a lot thicker consistency so it was harder to blend it nicely, there was a lot of streaks while applying and much harder to buff it out. I definitely prefer Illamasqua white base because pigmentation is very good, easier to apply and it is a lot less streaky while applying.

 Illamasqua skin base

- Applied using flat foundation brush
-Easy to blend
-Smooth texture
-Medium thickness consistency (not too thick or watery)
-Medium coverage
-Is not matte, more luminous


 Kryolan Supercolor

-Applied with flat foundation brush
-Hard to blend
-Thick consistency
-Streaky applicastion
-Needed to buff out with a kabuki brush
-Semi matte finish
-High coverage


Kryolan Aquacolor

- Applied using flat foundation brush
-Brush needs to be dipped into water constantly
-Dries quickly
-Matte finish
-Streaky application-
-Does not blend (kabuki buffing brush needed, creates less coverage)


Colour Theory

Analogous color scheme - analogous colors are the colors that are next to each other on the color wheel. I chose light blue, medium blue, light green and darker green for this look because these are the analogous colors.


Complimentary color scheme - complimentary colors are the colors that are opposite each other on the color wheel, if combined they cancel each other out. I chose light orange, yellow, medium blue and purple, because those are the colors that are opposite to each other.


Monochromatic color scheme - Monochromatic colors are the colors that come from one single color, they can be as light or dark but has to be that one color. I chose red color and used different lightness and darkness of it to create monochromatic look.


Achromatic colors - Achromatic colors are black, grey and white      


Analogous look


Monochromatic look             


Complimentary look